Installing a septic tank riser lid might not be the most glamorous home improvement project, but it’s one of those essential tasks that can save you a lot of time, money, and hassle down the road. Whether you’ve just had a septic tank installed or you want to improve access to an existing tank, knowing how to install a septic tank riser lid properly is invaluable. In this article, we’ll walk you through every step of the process, explaining why riser lids are so important, what tools and materials you’ll need, and practical tips to make the entire job easier and safer. By the end of this comprehensive guide, you’ll be ready to install your own septic tank riser lid confidently and efficiently.
- What Is a Septic Tank Riser Lid and Why Is It Important?
- Tools and Materials Needed for Installing a Septic Tank Riser Lid
- Step 1: Preparing the Septic Tank Access Area
- Tips for Preparing the Access Area
- Step 2: Installing the Septic Tank Riser
- Common Challenges During Riser Installation
- Step 3: Placing the Septic Tank Riser Lid
- Benefits of a Properly Installed Riser Lid
- Step 4: Securing the Lid and Final Clean-Up
- Additional Precautions
- Common Mistakes to Avoid During Installation
- Maintenance Tips for Your Septic Tank Riser Lid
- Cost and Time Considerations
- Frequently Asked Questions About Septic Tank Riser Lids
- Can I install a septic tank riser lid myself?
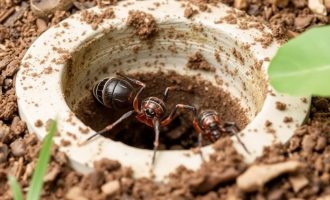
- Will a riser lid attract insects or pests?
- How often should I check the riser lid?
- Can I paint my riser lid?
- What if my septic tank is under a driveway?
- Environmental Benefits of Installing a Septic Tank Riser Lid
- Septic Tank Riser Lid Checklist
- Conclusion
What Is a Septic Tank Riser Lid and Why Is It Important?
If you have a septic system at home, the septic tank is buried underground to keep it out of sight and safely contained. But that can make it tricky to access when maintenance or inspection is needed. This is where a septic tank riser lid plays a critical role. A septic tank riser is a vertical extension that brings the tank’s access point up to or near ground level, while the riser lid serves as a cover for that access opening.
Without a riser and properly installed riser lid, you might find yourself digging up dirt every time a inspection or pump-out is due, which is labor-intensive, messy, and time-consuming. A riser lid provides easy, safe, and secure access to the septic tank below. It also helps prevent debris, rainwater, or even curious children and pets from falling into the tank, making it a crucial safety feature.
Tools and Materials Needed for Installing a Septic Tank Riser Lid
Before you start your installation, it’s important to gather all the necessary tools and materials. Here’s a handy table summarizing what you will need:
| Item | Description | Why You Need It |
|---|---|---|
| Septic Tank Riser | Plastic or concrete extension ring | Raises the access port to ground level |
| Septic Tank Riser Lid | Weatherproof and secure cover | Protects opening and allows easy access |
| Concrete or Mortar Mix | For sealing and stabilizing surrounding areas | Ensures a solid, watertight seal |
| Level | Tool to check horizontal alignment | Ensures riser sits evenly and safely |
| Plastic Shovel or Spade | For digging around the tank | Minimizes damage to existing structures |
| Caulk or Construction Adhesive | Weatherproof sealant | Secures riser lid to riser and keeps water out |
| Gloves and Safety Glasses | Personal protective equipment | Keeps you safe while working |
Having these items ready will streamline the installation process greatly.
Step 1: Preparing the Septic Tank Access Area
Before you can install the septic tank riser lid, you need to prepare the access point properly. Start by locating your septic tank’s access riser or opening. This is usually buried 6 to 12 inches below the ground surface. Using a plastic shovel or spade helps to avoid damaging the tank or piping during excavation.
Once the top of the tank or existing riser is exposed, clear away all dirt and debris to make sure the surface is clean and level. If your tank currently doesn’t have a riser, but only a concrete lid below the surface, consider installing a riser first. This involves fitting the plastic riser onto the tank’s access port. Leveling is crucial at this stage: use a level to check the surface and adjust the soil or base as needed. A well-prepared base ensures that the riser sits firmly and won’t shift over time.
Take extra care here because a poor foundation can cause leaks or make it difficult later to remove the riser lid.
Tips for Preparing the Access Area
- Prevent damage to your septic system by digging carefully and slowly.
- Keep tools clean to avoid contaminating the septic tank area.
- Wear gloves and safety glasses to protect yourself from bacteria and debris.
Step 2: Installing the Septic Tank Riser

If a riser is not already in place, this is the time to install it. The riser lifts the tank’s access port from underground to above ground, which allows easier maintenance. Most risers are made from durable plastic that resists corrosion and cracking, though concrete options are also available.
First, check the dimensions of your tank’s access port so you can select the proper size riser. Septic tank risers come in various diameters, commonly 24 inches or 30 inches.
Position the riser directly over the tank’s access opening. You may need to apply mortar or a special sealant between the riser base and the tank lid to ensure a watertight, secure fit. It’s essential that the riser is firmly seated and level.
After placing the riser, wait for any mortar to cure as recommended by the manufacturer before proceeding to the next step.
Common Challenges During Riser Installation
- Matching riser size improperly can cause leaks or fitting issues.
- Not sealing the riser base well can let water infiltrate the septic system.
- Riser not level can lead to shifting or lid misalignment.
Step 3: Placing the Septic Tank Riser Lid

Now that the riser is installed and stable, it’s time to place the riser lid on top. The riser lid serves a critical role—it must create a secure, weatherproof seal while allowing easy removal for tank maintenance.
Place the riser lid onto the riser and ensure it fits tightly without wobbling or gaps. Some lids screw on or snap into place, while others may require a bead of caulk or construction adhesive around the rim to hold them securely and keep water out.
While it’s important for the riser lid to be secure, you also want to maintain accessibility—avoid permanent bonds that make lid removal difficult. Look for lids designed specifically for your riser model.
Benefits of a Properly Installed Riser Lid
| Benefit | Description |
|---|---|
| Easy Access | Quickly remove lid for inspections or pumping. |
| Safety | Prevents accidental falls and keeps debris out. |
| Weather Protection | Keeps rain and water from entering the tank. |
| Longevity | Protects the riser and underlying tank from damage. |
Step 4: Securing the Lid and Final Clean-Up
Once the riser lid is positioned, use a high-quality silicone-based caulk or construction adhesive to seal around the edges if recommended by the manufacturer. This not only waterproofs the lid but prevents insects or small animals from getting inside.
Inspect the riser lid and surrounding ground to make sure everything is stable and sealed. If there is loose soil, compact it around the riser carefully. Avoid piling soil too high or compacting too aggressively, as this could disturb the installation.
Finally, clean your tools and wash your hands thoroughly after the job is done. Proper hygiene is important due to exposure to septic system bacteria.
Additional Precautions
- Label the riser lid for easy identification during future maintenance.
- Consider painting or marking the lid to blend with your yard but remain visible.
- Regularly inspect the riser lid to ensure it remains secure and intact.
Common Mistakes to Avoid During Installation
Like any DIY project, installing a septic tank riser lid comes with potential pitfalls. Here are some common mistakes and how to avoid them:
- Improper Sizing: Choosing a riser or lid that does not match your tank can cause leaks and poor fits.
- Skipping the Seal: Failing to seal the riser base and lid properly can allow water and debris into the system.
- Poor Leveling: Not setting the riser evenly causes lid misalignment and future problems.
- Ignoring Safety: Not wearing gloves or not checking for buried utilities before digging can be hazardous.
- Using Heavy Concrete Lids: Many modern risers use lightweight plastic lids which are safer and easier to handle.
Maintenance Tips for Your Septic Tank Riser Lid
Once your septic tank riser lid is installed, it’s not a set-it-and-forget-it situation. Regular maintenance will extend its lifespan and keep your septic system functioning properly.
- Check the lid periodically for cracks, gaps, or loose fittings.
- Clear away dirt or debris buildup around the riser to prevent water pooling.
- Test the sealant once a year and reapply caulk or adhesive if needed.
- Schedule regular septic tank inspections and pumping, using the riser as easy access.
- Never drive heavy vehicles over the riser lid, as this can crack or displace it.
Cost and Time Considerations
Installing a septic tank riser lid is relatively affordable compared to major septic repairs. Here’s a rough breakdown:
| Cost Item | Typical Price Range | Notes |
|---|---|---|
| Septic Tank Riser | $100 – $300 | Depends on material and size |
| Riser Lid | $50 – $150 | Plastic lids cheaper than concrete |
| Mortar / Sealant | $10 – $30 | Small quantities for sealing |
| Tools (if not owned) | $20 – $100 | Shovel, level, gloves, etc. |
In terms of time, expect the project to take anywhere from 2 to 6 hours, depending on how much digging and prep work you require. DIY installation can save labor costs, but if unsure, hiring a professional ensures the job is done right.
Frequently Asked Questions About Septic Tank Riser Lids

Can I install a septic tank riser lid myself?
Absolutely. With the right tools, materials, and careful attention to detail, many homeowners successfully do this installation themselves.
Will a riser lid attract insects or pests?
A properly sealed riser lid should prevent pests from entering. It’s important to ensure the seal is tight and any cracks are fixed promptly.
How often should I check the riser lid?
It’s good practice to inspect the lid twice a year, especially after severe weather events.
Can I paint my riser lid?
Yes, water-resistant exterior paint can be used to help the lid blend with the yard while still being durable.
What if my septic tank is under a driveway?
There are heavy-duty riser lids designed for vehicle traffic, but it’s best to consult a professional in these cases to avoid damage.
Environmental Benefits of Installing a Septic Tank Riser Lid
Beyond convenience and safety, installing a septic tank riser lid contributes to protecting the environment. Proper sealing prevents rainwater and runoff from infiltrating the tank, which could overload the system and lead to contamination. It also stops harmful bacteria and gases from escaping into your yard. Maintaining your septic system with easy access promotes regular upkeep, reducing leaks and groundwater pollution.
Septic Tank Riser Lid Checklist
- Fits securely and matches the riser size.
- Weatherproof and resistant to UV rays.
- Made from durable, impact-resistant materials.
- Easy to remove for maintenance.
- Properly sealed with caulk or adhesive.
- Stable, level installation.
Conclusion
Installing a septic tank riser lid is a smart investment that greatly simplifies septic system maintenance while enhancing safety and protecting your property. By following this step-by-step guide, you can ensure the lid fits securely, seals properly, and provides easy access for inspections and cleaning. Remember to prepare the area carefully, level the riser, and use appropriate sealants to avoid leaks and damage. Whether you choose to tackle the installation yourself or hire a professional, maintaining your septic tank with a correctly installed riser lid will save you time, money, and headaches in the future. With regular maintenance and attention, your septic system—and your yard—will stay safe, clean, and functional for years to come.
Помогла вам статья?