Maintaining a septic system might sound daunting at first, but with a little knowledge and regular inspection, it’s easier than you think. DIY septic tank inspection is an excellent way to keep your system running smoothly and avoid costly repairs or replacements. Whether you’re a homeowner looking to save money or someone who wants to understand how their septic system works, this guide will walk you through the essential steps for a thorough inspection. From what tools you need to what signs of trouble to watch for, we’ll cover everything to help you get hands-on with your septic tank maintenance.
- Understanding Your Septic System
- Why Regular Septic Tank Inspection is Crucial
- Tools and Materials Needed for DIY Septic Tank Inspection
- Step-by-Step Guide to Conducting a DIY Septic Tank Inspection
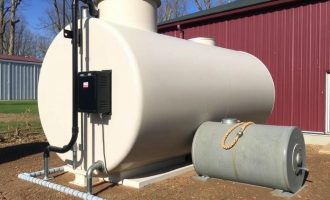
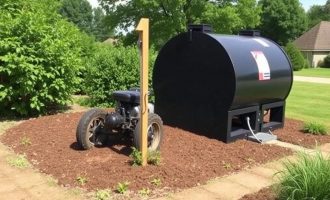
- 1. Locate Your Septic Tank
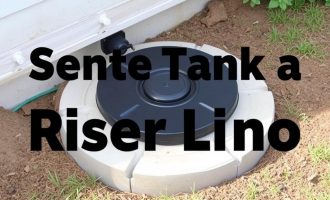
- 2. Expose and Open the Tank Lid
- 3. Inspect the Tank Interior
- 4. Measure the Sludge and Scum Levels
- 5. Inspect the Inlet and Outlet Pipes
- 6. Examine the Drain Field Area
- 7. Close the Tank Safely
- Key Signs of Septic System Problems to Watch For
- Maintaining Your Septic System Between Inspections
- When to Call a Professional
- Safety Precautions for DIY Septic Tank Inspection
- DIY Septic Tank Inspection Checklist
- Common FAQs About DIY Septic Tank Inspection
- How often should I inspect my septic tank?
- Can I inspect the septic tank myself?
- What happens if I ignore septic tank maintenance?
- Is it safe to open a septic tank lid?
- How can I reduce sludge buildup in my septic tank?
- Additional Resources for Septic System Owners
- Conclusion
Understanding Your Septic System
Before diving into septic tank inspection tips, it’s important to understand what your system does. Septic systems treat wastewater from your home by separating solids from liquids and allowing natural processes to break down waste. Typically, a septic system comprises a tank, a drain field, and a network of pipes. Solids settle at the bottom of the tank, while liquids flow out to the drain field and percolate through the soil, where bacteria further clean the water.
Knowing how your septic system works naturally makes DIY septic tank inspection simpler and less intimidating. Recognizing the key components and their function will help you spot issues early. When your system malfunctions, it can cause backups, foul odors, or even groundwater contamination. Regular inspections help prevent these problems and extend the lifespan of your system.
Why Regular Septic Tank Inspection is Crucial
People often overlook or postpone septic tank inspections, which can lead to expensive damage. The good news is, you don’t have to be an expert plumber to perform these inspections yourself. Regularly inspecting your septic tank allows you to:
- Detect signs of tank overflow or leakage.
- Ensure the tank and pipes are intact and free of cracks or corrosion.
- Prevent costly repairs by spotting minor problems early.
- Keep the drain field functioning properly and avoid soil contamination.
- Maintain the health of your household and surrounding environment.
A well-maintained septic system saves money in the long run, protects your property, and is environmentally responsible.
Tools and Materials Needed for DIY Septic Tank Inspection
To begin your inspection, gather some basic tools. You don’t need fancy equipment, but certain items will make the job safer and easier. Here is a simple checklist of what you should have ready:
| Tool/Material | Purpose |
|---|---|
| Flashlight | To see inside the tank and inspect hard-to-see areas. |
| Protective Gloves | To protect your hands from bacteria and harsh materials. |
| Screwdriver or Wrench | For opening and sealing septic tank lids. |
| Measuring Stick or Sludge Judge | To measure sludge and scum layers inside the tank. |
| Camera or Phone | To document any issues or take notes for future reference. |
| Face Mask | For protection against odors and pathogens. |
With these tools on hand, you’ll be prepared to conduct a basic septic tank inspection safely and effectively.
Step-by-Step Guide to Conducting a DIY Septic Tank Inspection
Having prepared your tools and understood the basics, it’s time to get hands-on. The following steps will guide you through a thorough septic tank inspection process:
1. Locate Your Septic Tank
Many people don’t know exactly where their septic tank is. It’s usually located 10 to 25 feet from the house, but this can vary. Check for lids or access covers in your yard, often concrete or plastic, approximately 4 feet deep. If you’re unsure, look for greener or softer grass patches, which could indicate moisture leaks from the drain field.
2. Expose and Open the Tank Lid
Once located, carefully remove any covering soil or debris above the tank lid. Use gloves and a wrench or screwdriver to open the lid. Be cautious—avoid inhaling fumes or standing directly over the opening. If the lid is buried more than a few feet or you feel uncomfortable, it’s best to call a professional.
3. Inspect the Tank Interior
Use your flashlight to look inside. You want to check for:
- Structural damage such as cracks or holes in the tank walls.
- Excessive buildup of sludge (solid waste) or scum (grease and oils) floating on top.
- Signs of leakage or infiltration of groundwater.
4. Measure the Sludge and Scum Levels
Using a measuring stick or sludge judge, measure:
- Depth of the liquid layer.
- Thickness of the scum layer floating above the liquid.
- Thickness of the sludge layer settled on the bottom.
These measurements help determine when your tank needs pumping. Generally, if the sludge occupies more than 25% of the tank volume or the scum layer is close to the outlet, it’s time for maintenance.
5. Inspect the Inlet and Outlet Pipes
Look closely at the inlet and outlet baffles (the pipes where water flows into and out of the tank). They prevent large solids from leaving the tank. Check for signs of clogging, corrosion, or damage that might be blocking the system.
6. Examine the Drain Field Area
Walk over the drain field and look for signs of trouble, like:
- Pooling water or soggy soil areas.
- Strong or unpleasant odors.
- Unusually lush green grass.
These symptoms could indicate that the drain field isn’t absorbing wastewater properly, which is a serious problem.
7. Close the Tank Safely
After your inspection, replace the lid securely and cover it with soil if necessary. Make sure it’s sealed to avoid accidents or surface water contamination.
Key Signs of Septic System Problems to Watch For

DIY septic tank inspection isn’t just about routine checks; it’s also about spotting early warning signs. Here are some common septic system issues you should be on the lookout for:
| Problem | Signs to Watch For | Potential Cause |
|---|---|---|
| Septic Tank Overflow | Slow drains, sewage backups, odors near tank | Full tank needing pumping or damaged baffles |
| Drain Field Failure | Pooling water, wet spots, strong odors in the yard | Soil saturation or clogged absorption lines |
| Cracked or Damaged Tank | Visible cracks inside tank, sinking ground near tank | Age, poor material, shifting soil |
| Pipes Blockage | Backups, slow drainage, gurgling sounds | Solid waste buildup, tree roots, or grease hardening |
| Excessive Sludge or Scum | Sludge levels near outlet, floating solids in tank | Lack of regular pumping or heavy waste input |
Recognizing these problems early can save you not only money but also potential health hazards.
Maintaining Your Septic System Between Inspections

Regular inspections go hand in hand with proper maintenance habits. Here are some simple things you can do to care for your system daily:
- Use water efficiently to reduce system overload.
- Avoid flushing harmful chemicals, grease, or non-biodegradable items.
- Don’t park heavy vehicles or build structures on top of the drain field.
- Redirect gutters and surface water away from the septic system area.
- Schedule tank pumping every 3-5 years or as recommended after inspection.
By following these tips, your septic system can work effectively without complications for many years.
When to Call a Professional
While DIY septic tank inspection tips empower you to manage routine maintenance, certain situations definitely call for expert help. Contact a professional if:
- You cannot locate or safely access the tank.
- You notice severe damage such as large cracks or leaks.
- There are recurring backups or persistent odors.
- The drain field shows extensive failure symptoms.
- You need a comprehensive pumping or repair service.
It’s better to invest in professional assessment or repairs early than risk system failure or environmental contamination.
Safety Precautions for DIY Septic Tank Inspection
Septic tanks contain harmful bacteria and gases, so safety should be your top priority during inspection. Always:
- Wear protective clothing like gloves and a face mask.
- Avoid leaning directly over the tank opening.
- Work in a well-ventilated area and watch for harmful gases.
- Keep children and pets away from the site.
- Never smoke or use open flames near the tank.
Following these precautions reduces health risks and makes the inspection process safer.
DIY Septic Tank Inspection Checklist
To summarize, here’s a handy checklist you can use for future inspections:
- Locate and expose the septic tank lid safely.
- Wear appropriate protective gear.
- Open the tank lid carefully and use a flashlight to inspect inside.
- Check for structural damage, sludge, and scum layers.
- Measure sludge and scum levels with a measuring stick or sludge judge.
- Inspect inlet and outlet baffles and pipes.
- Walk the drain field area looking for pooling water or odors.
- Close the tank lid tightly and cover securely.
- Record your findings and schedule maintenance as needed.
Using this checklist every year or two will keep your septic system in good shape.
Common FAQs About DIY Septic Tank Inspection
How often should I inspect my septic tank?
Most experts recommend inspecting your septic tank every 1-3 years, depending on usage, with pumping typically every 3-5 years. If you notice problems earlier, inspect immediately.
Can I inspect the septic tank myself?
Yes! Basic inspections like checking sludge levels and looking for damage can be done by homeowners with caution. However, more complicated issues may need a professional.
What happens if I ignore septic tank maintenance?
Neglected maintenance can lead to backups, drain field failure, high repair costs, and environmental contamination. It’s essential to inspect and pump regularly.
Is it safe to open a septic tank lid?
Opening the lid is safe if done carefully with protective gear and by avoiding inhalation of gases, but if the tank is buried deeply or the lid is stuck, professional help is recommended.
How can I reduce sludge buildup in my septic tank?
Reduce sludge by using water efficiently, avoiding non-biodegradable materials flushed into the system, and having your tank pumped on schedule.
Additional Resources for Septic System Owners

If you want to expand your knowledge beyond DIY septic tank inspection tips, consider the following:
- Local health department guidelines on septic system maintenance.
- Websites dedicated to septic care, such as the Environmental Protection Agency (EPA).
- Community workshops or home improvement classes on septic systems.
- Consultations with licensed septic service providers.
Accurate information helps you maintain a reliable and safe septic system.
Conclusion
DIY septic tank inspection tips empower homeowners to take control of their wastewater treatment system’s health, saving time and money in the process. By understanding the workings of your septic system, using the right tools, and following a clear, step-by-step inspection method, you can detect problems early and prevent costly failures. Remember, safety is crucial when inspecting your septic tank, so always wear protective gear and avoid direct exposure to potentially harmful gases. Regular maintenance combined with timely professional help when needed will keep your septic system functioning efficiently for years to come. Taking a proactive approach not only protects your home and family but also respects the environment. So roll up your sleeves, grab your flashlight, and start your DIY septic tank inspection today!
Помогла вам статья?