Installing a septic tank riser is one of the smartest investments you can make to maintain and manage your septic system efficiently. Whether you’re a seasoned homeowner or considering how to improve your septic system’s accessibility, understanding how to install a septic tank riser can save you time, effort, and money in the long run. This guide will walk you through every detail, from understanding what a septic tank riser is to practical installation steps, tools required, and maintenance tips. Let’s dive into the process and simplify this essential home improvement.
- What is a Septic Tank Riser and Why Should You Install One?
- Benefits of Installing a Septic Tank Riser
- Tools and Materials You’ll Need for Installing a Septic Tank Riser
- Step-by-Step Process on How to Install a Septic Tank Riser
- Step 1: Locate Your Septic Tank Access Lid
- Step 2: Dig Around the Tank Opening
- Step 3: Measure Your Tank Lid Diameter
- Step 4: Choose the Right Septic Tank Riser Kit
- Step 5: Clean the Tank Lid Surface
- Step 6: Position the Gasket or Seal
- Step 7: Install the Riser Rings
- Step 8: Secure the Riser to the Tank Lid
- Step 9: Backfill Around the Riser
- Step 10: Test the Riser Installation
- Maintenance Tips for Your Septic Tank Riser
- Common Mistakes to Avoid When Installing a Septic Tank Riser
- Cost and Time Considerations for Septic Tank Riser Installation
- Frequently Asked Questions About Septic Tank Risers
- How often should I inspect my septic tank riser?
- Can I install a septic tank riser myself?
- What materials are septic tank risers made from?
- Will installing a riser affect my septic system warranty?
- Are riser lids safe to walk on?
- Environmental Benefits of Using a Septic Tank Riser
- Conclusion
What is a Septic Tank Riser and Why Should You Install One?
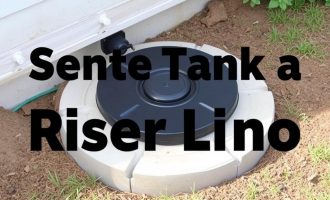
A septic tank riser is essentially a vertical extension that brings the access point of your septic tank flush with the surface of your ground. Traditionally, septic tanks sit several inches or even feet underground, making it difficult and time-consuming to locate the lid for routine inspections, pumping, or repairs. Installing a riser can address these problems by making the lid easily reachable without digging every time.
Beyond convenience, a septic tank riser improves safety too. Without a riser, hidden septic tank lids could pose a hazard to children, pets, or unaware visitors walking on your property. Additionally, risers are typically made from durable materials that resist corrosion and weathering, enhancing the longevity and accessibility of your septic system.
Benefits of Installing a Septic Tank Riser
- Easier access for inspections and maintenance.
- Prevents grass, dirt, and debris from clogging the tank lid.
- Improves safety by reducing the risk of accidents.
- Can save money on septic system services by reducing labor time.
- Extends the lifespan of your septic tank lid and components.
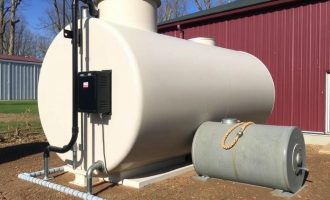
Tools and Materials You’ll Need for Installing a Septic Tank Riser
Before starting, gathering the proper tools and materials will make the installation process smoother and more efficient. Here is a handy table outlining what you might need:
| Tool/Material | Purpose |
|---|---|
| Septic Tank Riser Kit | The primary component; includes riser rings and lids. |
| Shovel | For digging around the septic tank access point. |
| Utility Knife | To cut and trim seals or gaskets. |
| Measuring Tape | For measuring the depth and diameter of the tank opening. |
| Level | Ensures the riser is installed level for proper sealing. |
| Concrete or Adhesive Sealant | To seal the riser to the tank and prevent leaks. |
| Rubber Gasket or Seal | Prevents odors and water infiltration. |
| Gloves and Safety Gear | Important for protection while digging and handling materials. |
Step-by-Step Process on How to Install a Septic Tank Riser
Let’s walk through the installation step by step to ensure your septic tank riser is safely and properly installed.
Step 1: Locate Your Septic Tank Access Lid
Start by identifying where your septic tank lid is buried. This can often be found by checking property records, talking to the original installer or homeowners, or by following any existing markers. You may need to use a metal detector or probe gently with a digging tool to locate the exact spot. Be careful not to cause damage to the tank or pipes beneath the surface.
Step 2: Dig Around the Tank Opening
Once located, shovel dirt away carefully to expose the existing lid completely. Remove any grass, roots, or debris around the area. The hole should be large and deep enough to comfortably fit the riser rings without disturbing the tank itself. Typically, you’ll want a clearance of at least 6 to 12 inches around the tank lid.
Step 3: Measure Your Tank Lid Diameter
Use your measuring tape to determine the exact diameter of the septic tank lid. Most standard lids range from 18 to 24 inches in diameter, but measurements are crucial to ensure you purchase a correctly sized riser. Incorrect sizing could lead to poor sealing or structural issues.
Step 4: Choose the Right Septic Tank Riser Kit
Pick a riser kit compatible with your tank size and made from durable materials like high-density polyethylene (HDPE) or reinforced plastic. Some risers come insulated to protect against freezing, which is especially useful in colder climates. Ensure the riser lid has a locking feature to prevent unauthorized opening or tampering.
Step 5: Clean the Tank Lid Surface
Before installing the riser, thoroughly clean the septic tank lid’s surface to remove dirt, grease, or old sealant that could interfere with proper adhesion. Scrubbing it with a stiff brush and rinsing with water can help, but make sure the surface is dry before proceeding.
Step 6: Position the Gasket or Seal
Place the rubber gasket or sealing ring around the tank lid edge. This component prevents unpleasant odors from escaping and stops surface water from entering the septic tank, which could overload the system.
Step 7: Install the Riser Rings
Carefully lower the first riser ring onto the septic tank lid, ensuring the gasket is securely seated. If your riser requires multiple rings to reach the surface, stack them together tightly. Use a level to confirm the riser is perfectly vertical and evenly seated.
Step 8: Secure the Riser to the Tank Lid
Apply a bead of concrete or specialized adhesive sealant around the base of the riser to firmly bond it to the tank lid. Follow the manufacturer’s instructions for curing times to ensure a watertight seal.
Step 9: Backfill Around the Riser
Once the sealant has dried, backfill the hole carefully with soil, tamping it down gently to prevent shifting but avoid damaging the riser. Make sure the riser lid is flush with the ground level or slightly above to prevent water pooling.
Step 10: Test the Riser Installation
Finally, open and close the riser lid to ensure it fits securely, locks properly, and seals tightly. Conduct a visual inspection around the edges for any gaps or leaks. Your septic tank riser installation is now complete!
Maintenance Tips for Your Septic Tank Riser

Installing a riser improves septic tank access, but maintaining it is equally important. Here are a few handy tips to keep your riser in top condition:
- Regularly Inspect the Riser Lid: Check for cracks, warping, or damage to the riser lid and rings, especially after extreme weather events.
- Ensure the Seal is Intact: Replace rubber gaskets if they start to degrade or break down to prevent odors and water infiltration.
- Clear Surrounding Area: Keep the area around the riser free of heavy equipment and avoid planting deep-rooted trees nearby which could damage the tank.
- Schedule Routine Pumping: Even with a riser, the septic tank should be pumped every 3-5 years depending on usage.
- Lock the Lid: Use or replace locking mechanisms if necessary to prevent unauthorized access and ensure safety.
Common Mistakes to Avoid When Installing a Septic Tank Riser
Understanding potential pitfalls can help you avoid costly mistakes. Here’s a quick list of common errors homeowners make when installing a septic tank riser:
| Mistake | Why It’s a Problem | How to Avoid |
|---|---|---|
| Incorrect Riser Size | Leads to poor sealing or inability to fit properly. | Measure tank lid carefully and select correct riser. |
| Improper Sealing | Allows odors to escape and surface water to enter the tank. | Use proper gasket and sealant as instructed. |
| Not Leveling the Riser | Can cause structural stress or poor fit of the lid. | Use a level to ensure vertical and accurate installation. |
| Ignoring Local Codes | May lead to fines or failed inspections. | Check local regulations and obtain permits as needed. |
| Failing to Lock the Lid | Potential safety hazard and unauthorized access. | Always use lids with locking features and secure them. |
Cost and Time Considerations for Septic Tank Riser Installation

The cost to install a septic tank riser typically ranges between $100 to $500 depending on the size, material, and whether you hire a professional or do it yourself. Timewise, a DIY installation might take between half a day to a full day, assuming you have the right tools and some experience in digging and working outdoors. Hiring a professional can lead to quicker and sometimes more reliable results, but will cost more.
Frequently Asked Questions About Septic Tank Risers
How often should I inspect my septic tank riser?
It’s best to inspect your riser during routine septic system maintenance, typically every 1 to 3 years, or after extreme weather.
Can I install a septic tank riser myself?
Yes, with proper tools and knowledge, many homeowners successfully install risers on their own. However, always follow safety guidelines and local regulations.
What materials are septic tank risers made from?
Common materials include high-density polyethylene (HDPE), fiberglass, and heavy-duty plastic, all designed for durability and resistance to corrosion.
Will installing a riser affect my septic system warranty?
Usually not, but it’s wise to check your system’s warranty or consult with the manufacturer before installation.
Are riser lids safe to walk on?
Many riser lids are designed to support a person’s weight, but it’s best to avoid excessive pressure or jumping to prevent damage.
Environmental Benefits of Using a Septic Tank Riser
Beyond the personal convenience, installing a septic tank riser can have positive environmental impacts. By ensuring a watertight seal and reducing the chances of surface water infiltration, you protect groundwater quality. Preventing leaks and odors also helps maintain healthier soil conditions around your property. Additionally, easier access encourages regular maintenance, which means fewer septic system failures and environmental hazards.
Conclusion
Installing a septic tank riser is a practical and valuable upgrade for any homeowner relying on a septic system. By bringing your tank’s access point flush with ground level, you simplify inspections, maintenance, and pumping—saving time and reducing effort during these essential tasks. With the right tools, careful preparation, and attention to detail, you can confidently install a riser yourself or oversee a professional job that meets all safety and local requirements. Ultimately, a septic tank riser improves safety, protects your investment, and helps keep your septic system functioning efficiently for years to come. Whether for convenience, safety, or environmental care, it’s a smart home improvement that pays off in reliability and peace of mind.
Помогла вам статья?